Accounts and providers
Last updated: November 9, 2026
An account is a connection to one storage provider. This page covers adding one, the settings each provider needs, and managing your accounts afterwards.
Add an account
An account is a connection to one storage provider: its address and your access keys. The first time you open BucketWorx the window is empty and asks you to add one.
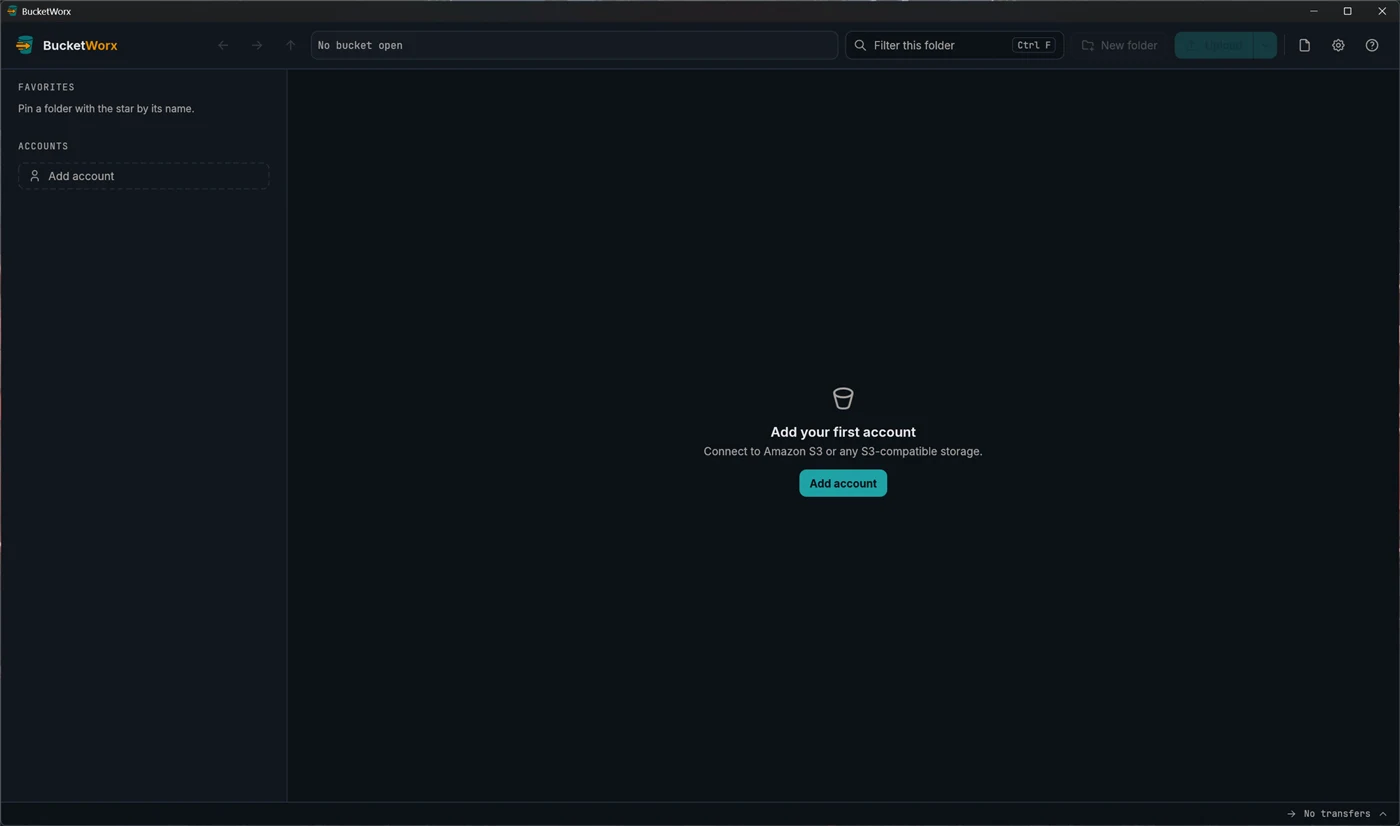
Pick your provider
BucketWorx has settings ready for AWS S3, Cloudflare R2, Backblaze B2, Wasabi, DigitalOcean Spaces and MinIO. Any other server that speaks the S3 protocol should work too, but we haven't tested those. Choosing a provider fills in the settings that provider needs.
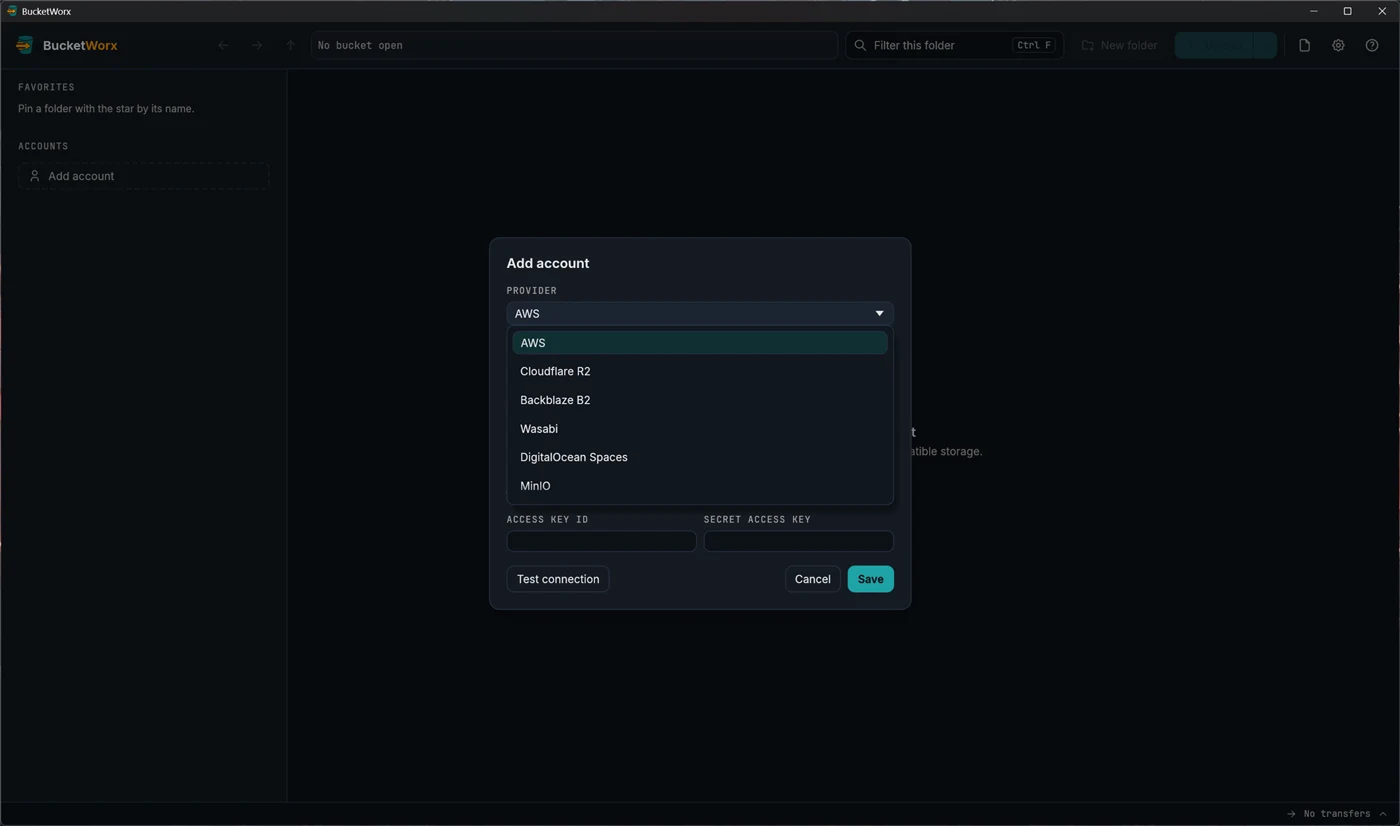
Amazon S3
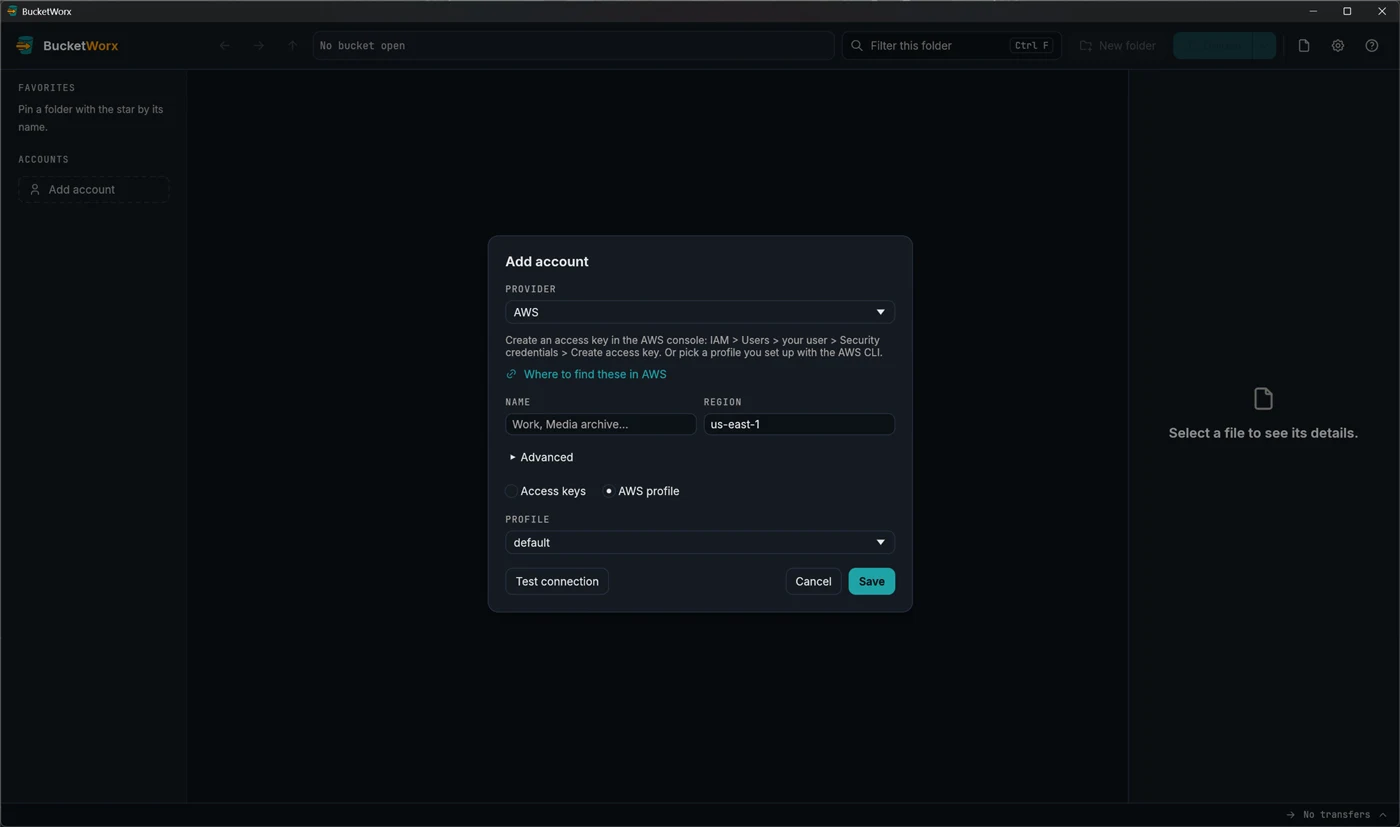
Give the account a name you will recognise (Work, Media archive), check the region, and paste an access key ID and secret access key. The form explains where to create a key in the AWS console and links to AWS's own guide. If you already use the AWS command line, choose AWS profile instead of access keys and pick a profile from your AWS files. BucketWorx only reads those files.
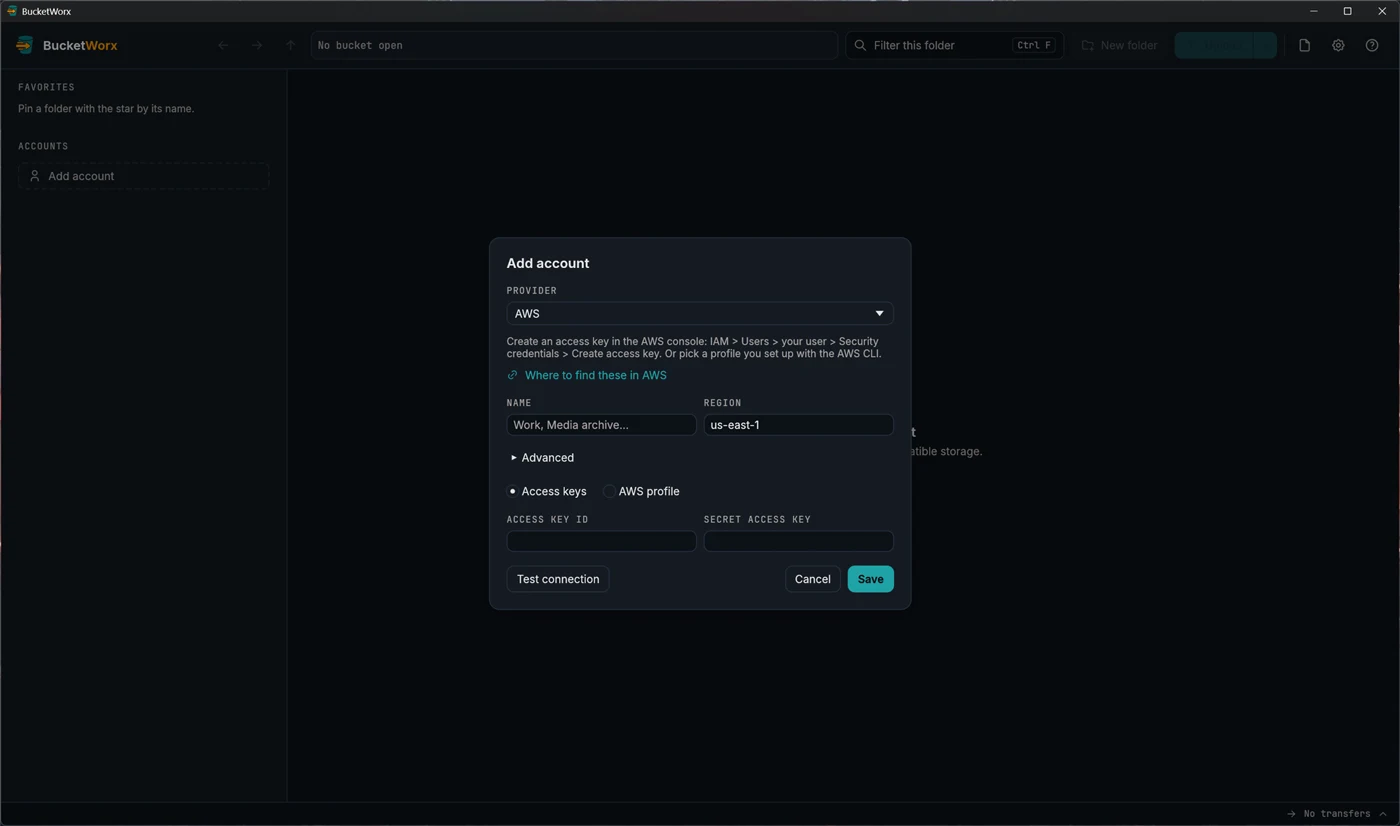
Cloudflare R2
R2 needs an endpoint URL as well as keys. In the Cloudflare dashboard open R2, then Manage API tokens, then Create API token. Cloudflare shows the access key ID and secret once, so copy them straight away. Copy the S3 API endpoint from the R2 overview page too. It looks like https://<account-id>.r2.cloudflarestorage.com.
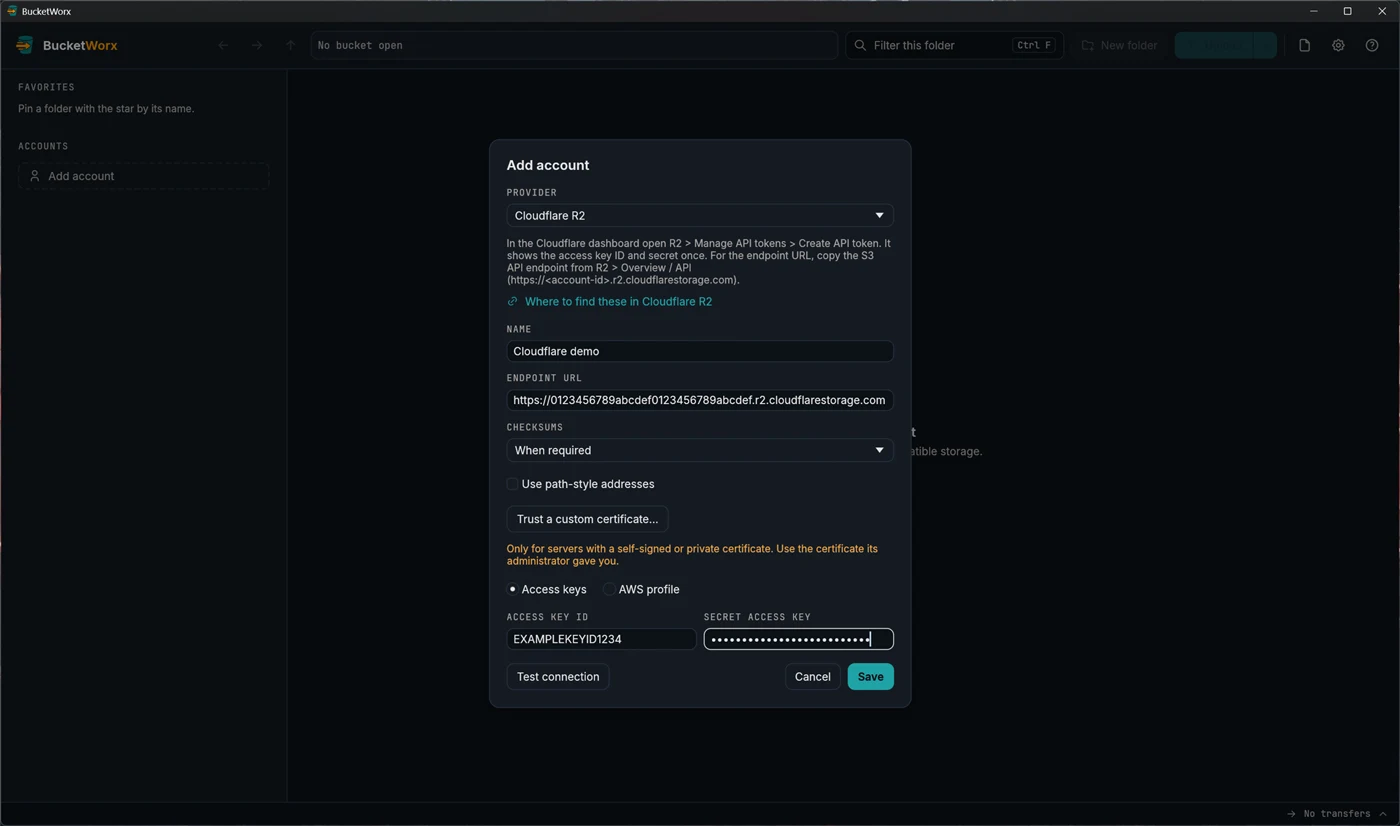
MinIO and other S3-compatible servers
For MinIO, or any server you run yourself, enter the server's address as the endpoint (for example http://localhost:9000). A self-hosted server usually wants Use path-style addresses ticked. If it uses a self-signed certificate, use Trust a custom certificate… and choose the certificate file its administrator gave you.
Press Test connection before you save. It answers within about ten seconds with "Connected. Found 3 buckets.", or says what is wrong.
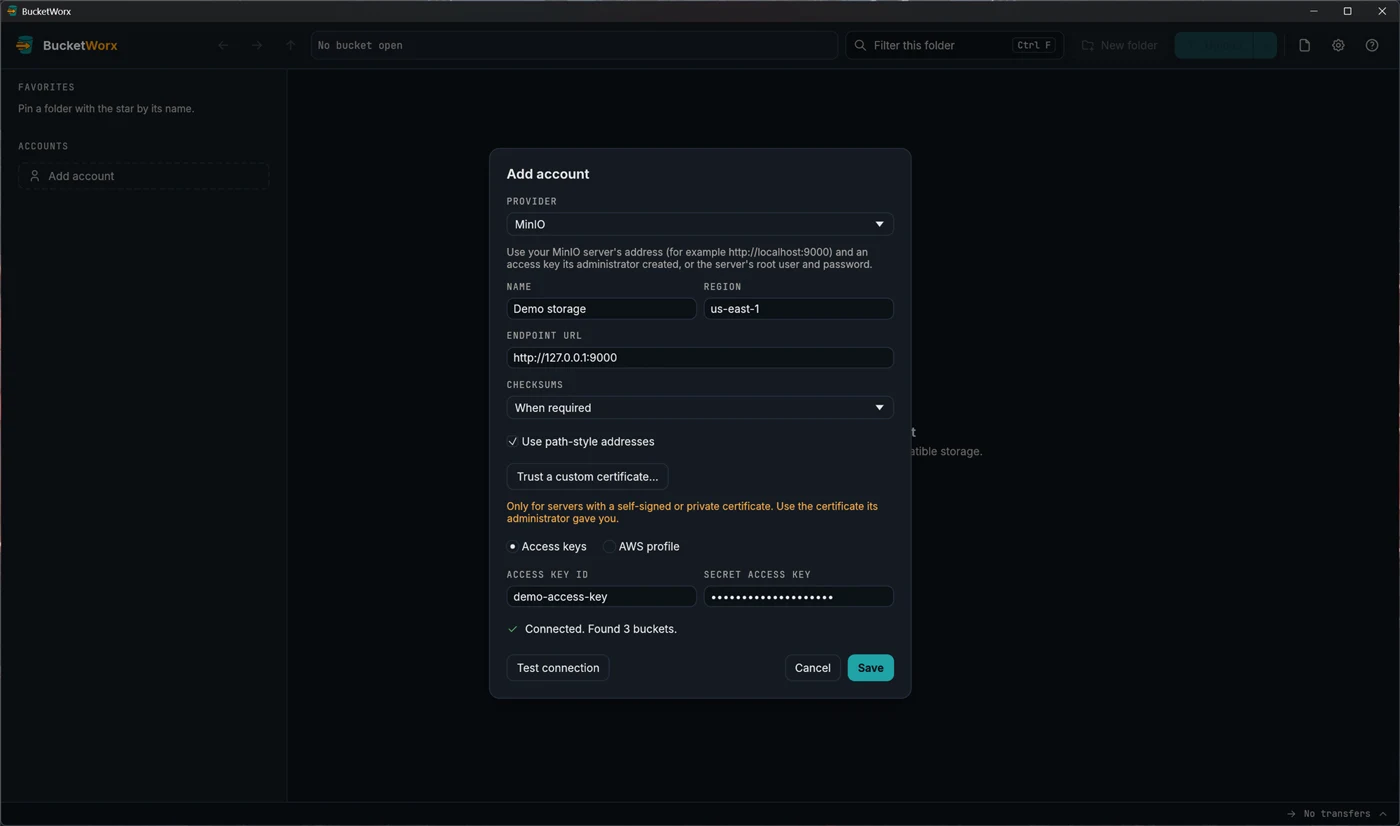
Where your secret key goes. BucketWorx stores secret keys in your operating system's keychain. They are never written to the settings file or to logs. If your system has no keychain you can use the key for this session only, or use an AWS profile.
Manage your accounts
Each account is a card in the sidebar showing a letter badge, its name and provider. Right-click the card, or use its "…" button, to Edit, Remove, refresh its bucket list, or move it up or down the list. The same actions are in Settings, Accounts.
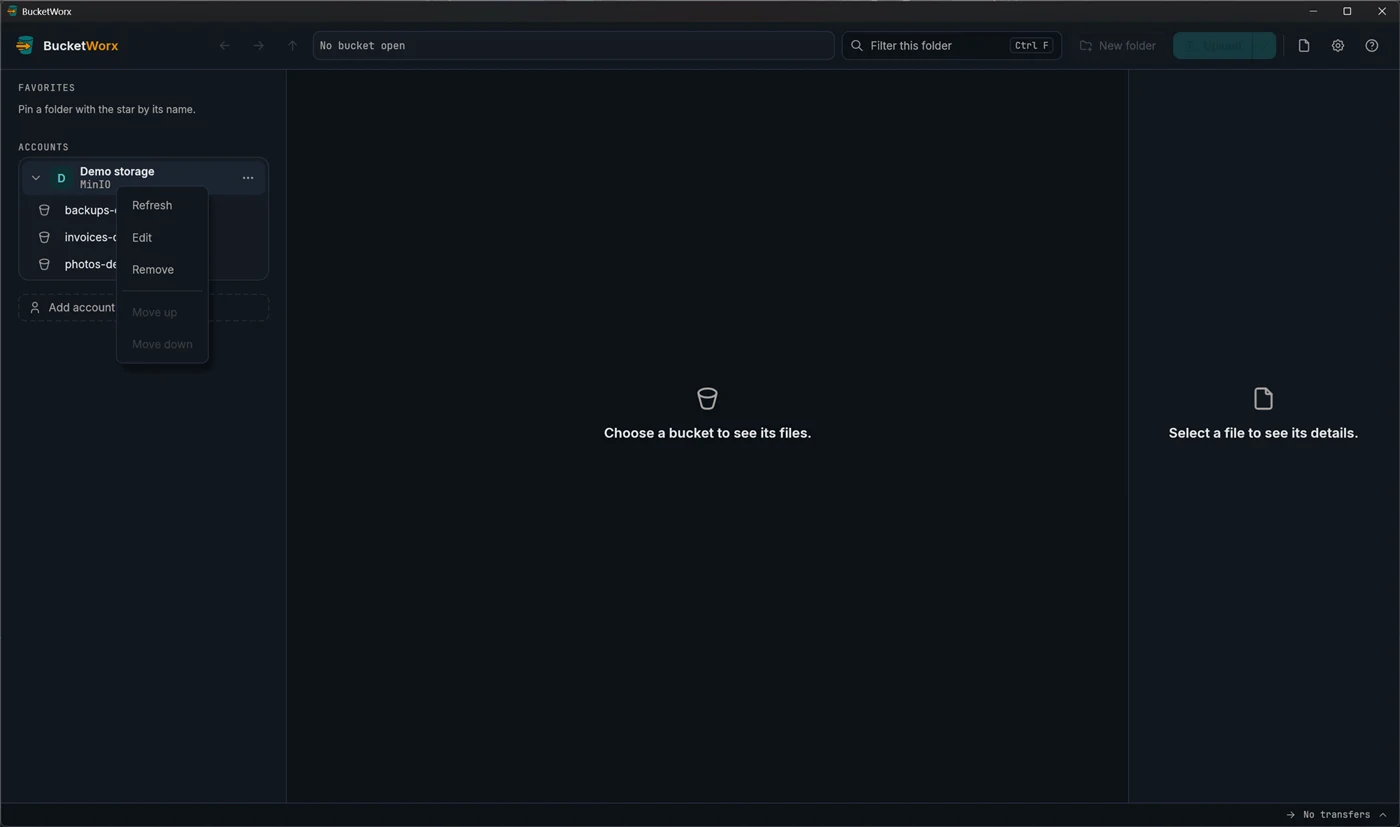
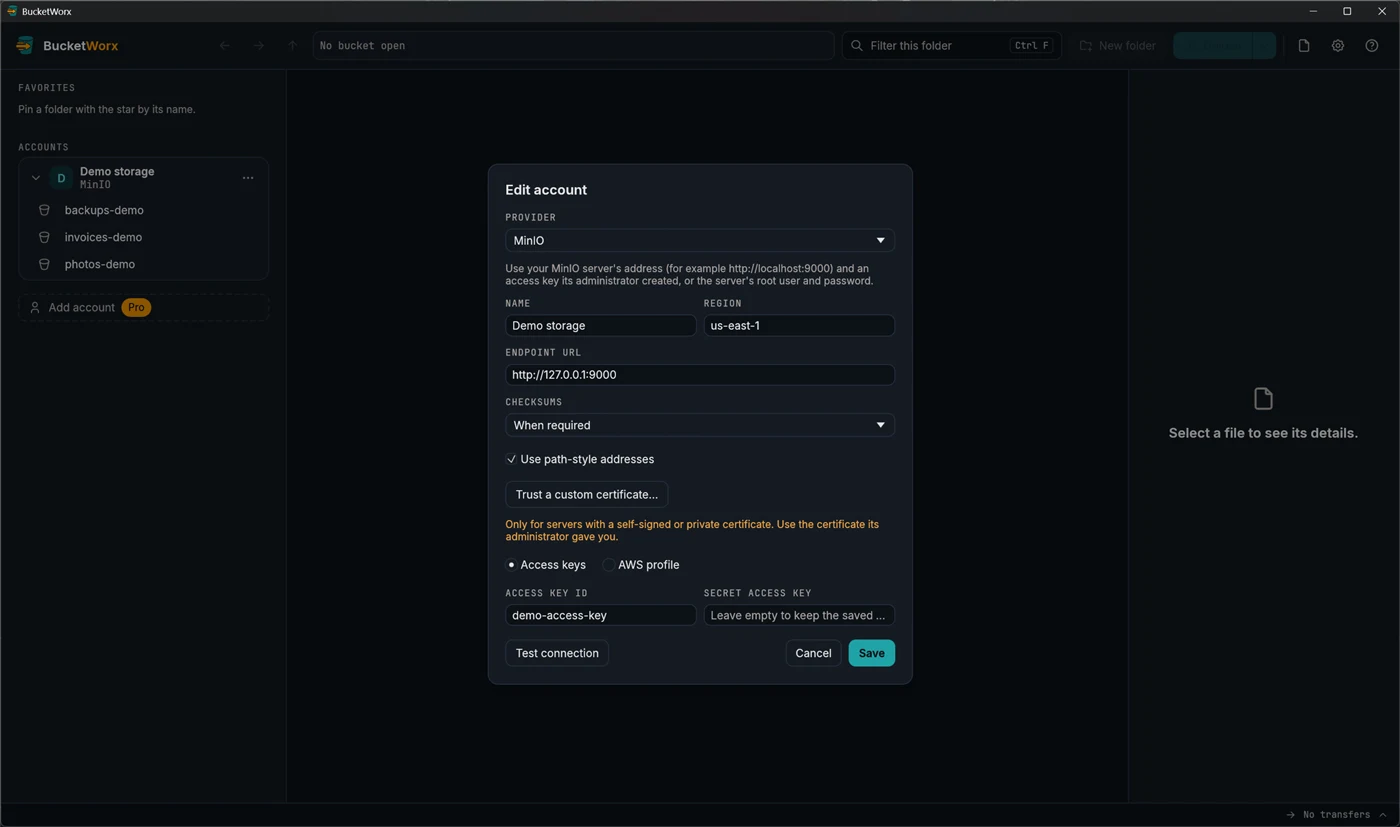
- Change keys. Edit the account and type the new secret. Leave the secret empty to keep the saved one.
- Remove an account. BucketWorx asks first, removes the key from this computer, and leaves your buckets alone.
- Use an AWS profile instead of keys. Pick a profile from ~/.aws/config and ~/.aws/credentials. SSO, assume-role and credential-process profiles work. The files are only read, never changed.
- No system keychain? Choose Use for this session only and the key is kept in memory until you close the app, or use an AWS profile.
- The key can't list buckets. Type the bucket names into the account's Bucket names field and they appear in the sidebar anyway. A bucket you create with such a key is added to that list for you.
- Mistakes are caught for you. If you paste a bucket's address as the endpoint, the form offers the right account endpoint and adds the bucket to Bucket names. An R2 account ID that isn't 32 letters and digits is flagged too. For Backblaze B2, Wasabi and DigitalOcean Spaces the endpoint is filled in from the region.
- Several accounts need Pro. The free edition uses one account. If you added more while Pro was on, they are kept but locked: they carry a Pro tag in the sidebar, and Settings, Accounts shows which one the free edition is using. Use this account (in Settings or on the card's right-click menu) changes which one that is. A licence key unlocks all of them at once.
Move accounts to another computer
From beta 5, Settings, Accounts has Export… and Import… under Move accounts to another computer. Export saves every account to one file, bucketworx-accounts.toml, with its provider, endpoint, region and access key ID. Secret keys are never included, so the file is safe to copy around; you type each secret again on the other computer.
- Import shows everything first. Before anything changes, the import lists each account: where it connects and how it signs in. A file with a broken entry imports nothing and says which entry is wrong.
- A name you already have. For each clash choose Skip it (the default), Import it as another name (offered as "Work (2)"), or Replace that account's settings. Replacing with the same server keeps the account's saved key, favorites and transfers. Replacing with a different server starts a fresh account: its key, favorites and transfers go.
- AWS profiles and certificates need a tick. An account that signs in with a local AWS profile, or brings its own trusted certificate, only imports after you tick the box saying you've checked it.
- Then add the secrets. Edit each imported account and type its secret key, or use accounts set-secret from the command line.
- The free edition imports one account when it has none yet, and says the rest need Pro.
More help
Topics
- Browsing your buckets
- Uploads, downloads and transfers
- Managing files
- Old versions, deleted files and undelete
- Buckets
- Settings and keyboard shortcuts
- The BucketWorx command line (CLI)
- AI agents (MCP)
- Free and Pro, and your licence key
- When something goes wrong
Step-by-step guides
- Connect Cloudflare R2
- Connect Backblaze B2
- Connect Wasabi
- Connect MinIO or another S3-compatible server
- Sync a folder to a bucket
- Share a file with a link
- Copy files between buckets and accounts
- How providers differ, and what BucketWorx does about it
All help, including installing BucketWorx.